
Migrate
Moving to day3, screen by screen.
Five steps: your domain, its DNS records, your list, and a test email. Every picture below is the real app.
- 1
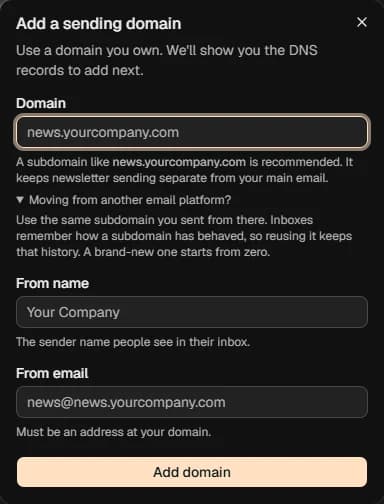
Add your sending domain
Under Sending, add the domain you send from, plus the From name and address. If you're moving from another platform, reuse the subdomain you sent from there: inboxes remember how a subdomain has behaved, and a new one starts from zero.
- 2
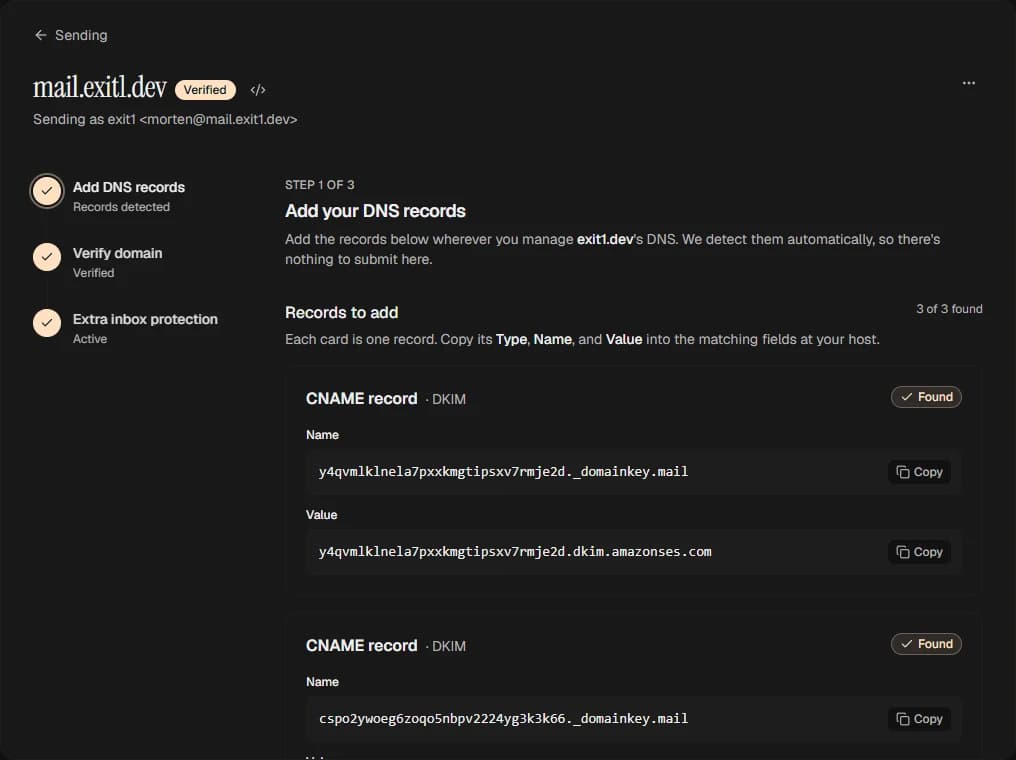
Copy the DKIM records to your DNS
day3 shows each record as a card with its type, name and value, each with a copy button. Paste them in wherever your DNS lives. There's nothing to submit: day3 checks for the records itself and marks each one Found.
- 3
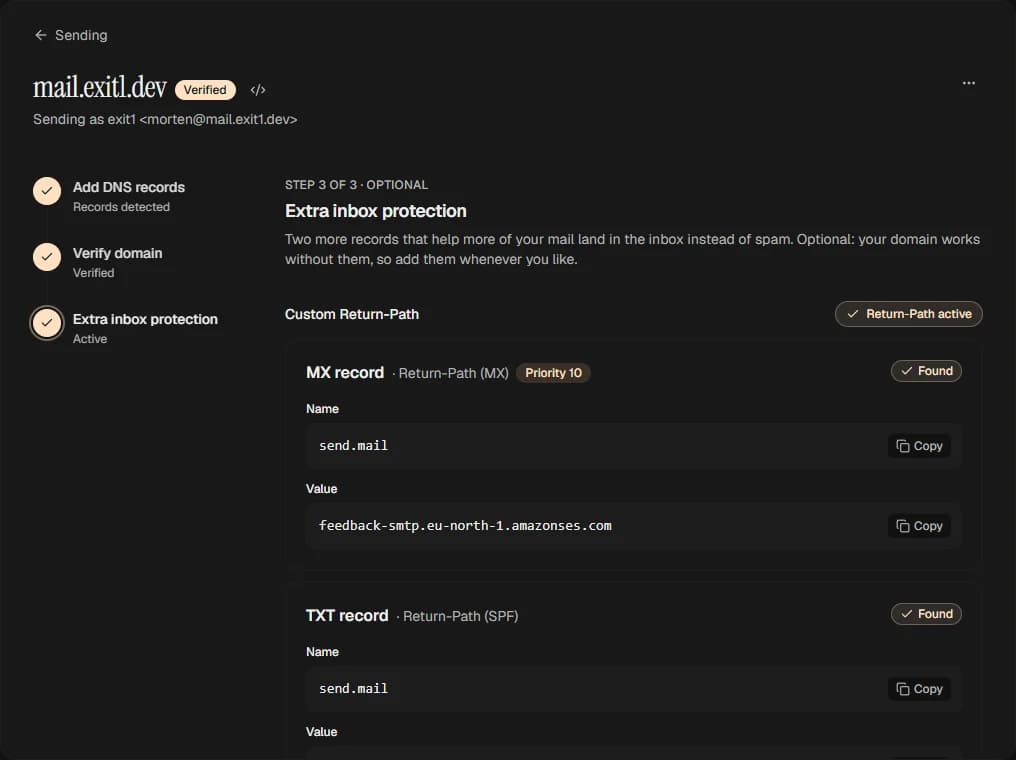
Add SPF and DMARC
The third step adds a custom Return-Path (an MX record and an SPF TXT record) and a DMARC record. Your domain sends without them, but they help more of your mail land in the inbox, so add them while you're in your DNS anyway.
- 4
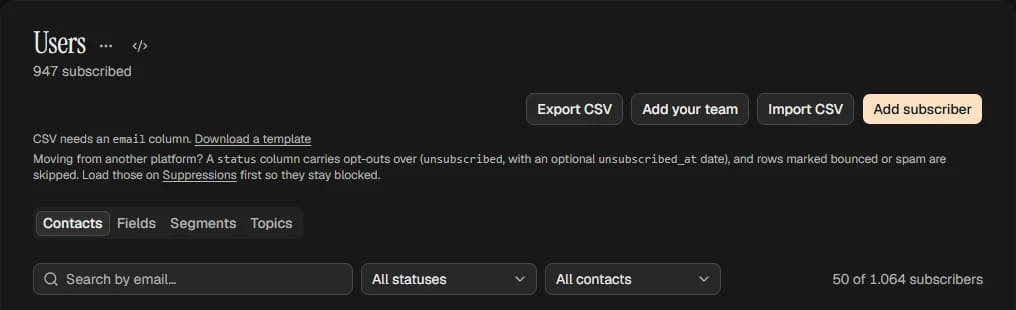
Load your suppressions, then import the CSV
Export your list from the old tool. Put its bounces and spam complaints on Suppressions first, so they stay blocked. Then open an audience and import the CSV: it needs an email column, first_name and last_name are optional, and any other column becomes a custom field. A status column carries unsubscribes over as unsubscribed. Up to 5,000 rows per file.
- 5
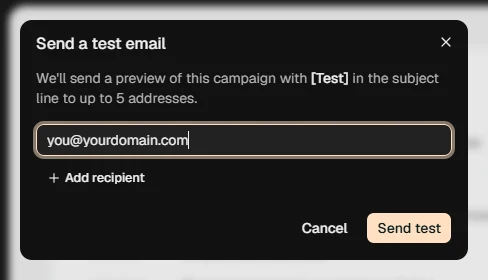
Send yourself a test
Open a campaign and press Send test. It goes to up to five addresses you name, with [Test] in the subject line, through the same pipeline as a real send. Check it lands in the inbox, from your domain, before you send to anyone else.
Moving by API instead?
The list part of the move works as API calls: create the audience, load suppressions, import contacts. The docs guide has the order and the requests.
Questions
- Do I keep my sender reputation?
- Mostly, if you keep the same sending domain. Reputation sits with the domain, not the tool, so reuse the subdomain you sent from before and add day3's DKIM records to it.
- Will unsubscribed people be mailed again?
- Not if they come across marked. Include a status column in the CSV and rows marked unsubscribed import as unsubscribed. Rows marked bounced or spam are skipped, which is why the suppression list goes in first.
- My list is bigger than 5,000 rows. What now?
- Split the export into files of 5,000 rows and import them one after another into the same audience. Re-importing an address doesn't create a duplicate.
- Can I do all of this over the API?
- The list, yes: audiences, contacts and suppressions all have endpoints, and the docs have a step-by-step guide for moving a list that way. The sending domain is set up once, in the app.
- Does the test send cost anything?
- It counts against your monthly allowance like any email, since it's a real send. With five recipients at most, that's five emails.
Related reading
- How to migrate an email list without wrecking your deliverabilityMoving providers is mostly a data-import problem with one deliverability trap in it. Get the order right and mailbox providers barely notice. Get it wrong and you can undo years of reputation in one send.Read on
- DeliverabilityAuthenticated domains, one-click unsubscribe, and automatic suppression of bounces and complaints.Read on
- PricingNine plans from $1/mo for 1,000 emails to $220/mo for 1,000,000. Unlimited subscribers on all of them.Read on
- All comparisonsHow day3's send-based model stacks up against the tools that price by contact count.Read on
- Migrate a listThe order of operations for moving a list off another provider: suppressions first, then contacts.Read on
Rather we did the move with you?
Email hello@day3.app with where you're moving from, and we'll help you through it.